Android Native Modules in React Native
This article is based on the talk I gave at MDevConf on December 3, 2022. You can find the slides for this talk here.
As you may already know, React Native is a React-based framework for creating native applications for iOS and Android using Javascript. React Native has the ability to transpile Javascript code into native code for each platform (Swift or Objective C for iOS devices, Kotlin or Java for Android devices), but also in case you need to write native code, React Native exposes the NativeModule API to facilitate this work.
The way React Native "transforms" Javascript / React code into native code is by using the so-called Bridge, which is basically a connection between the Javascript code and the native code.
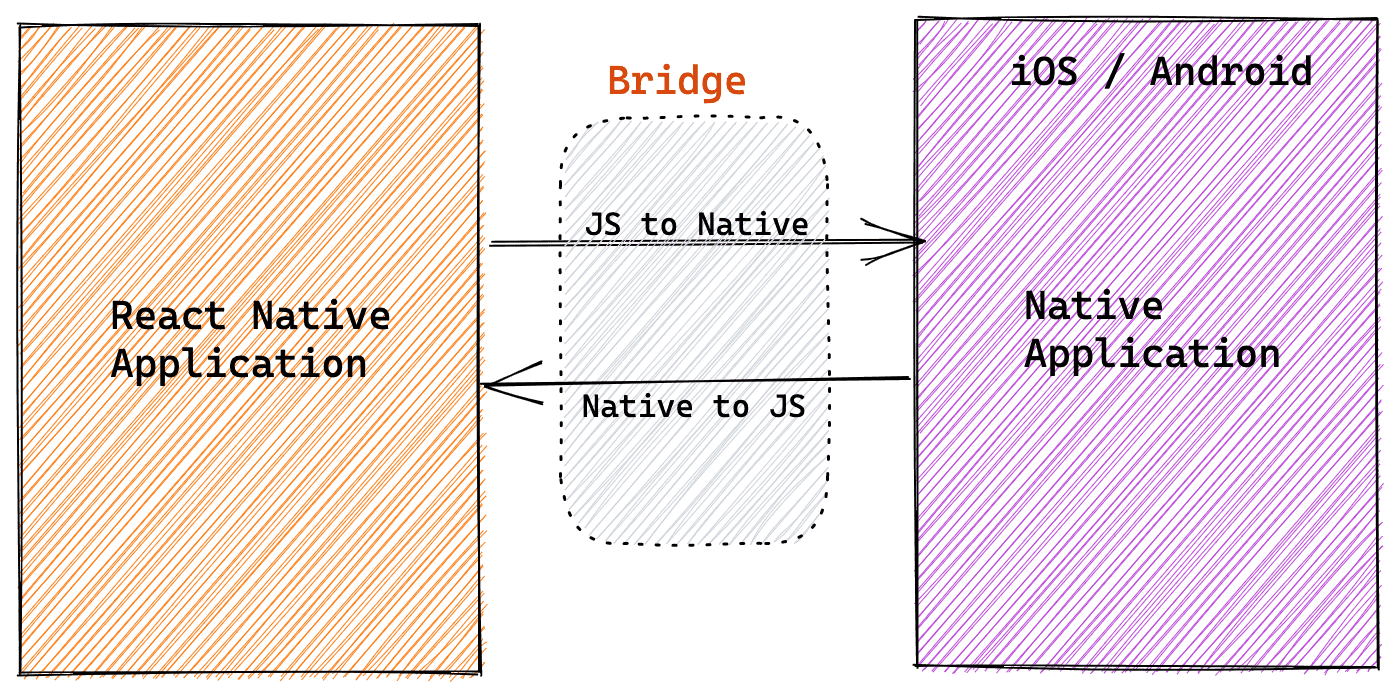
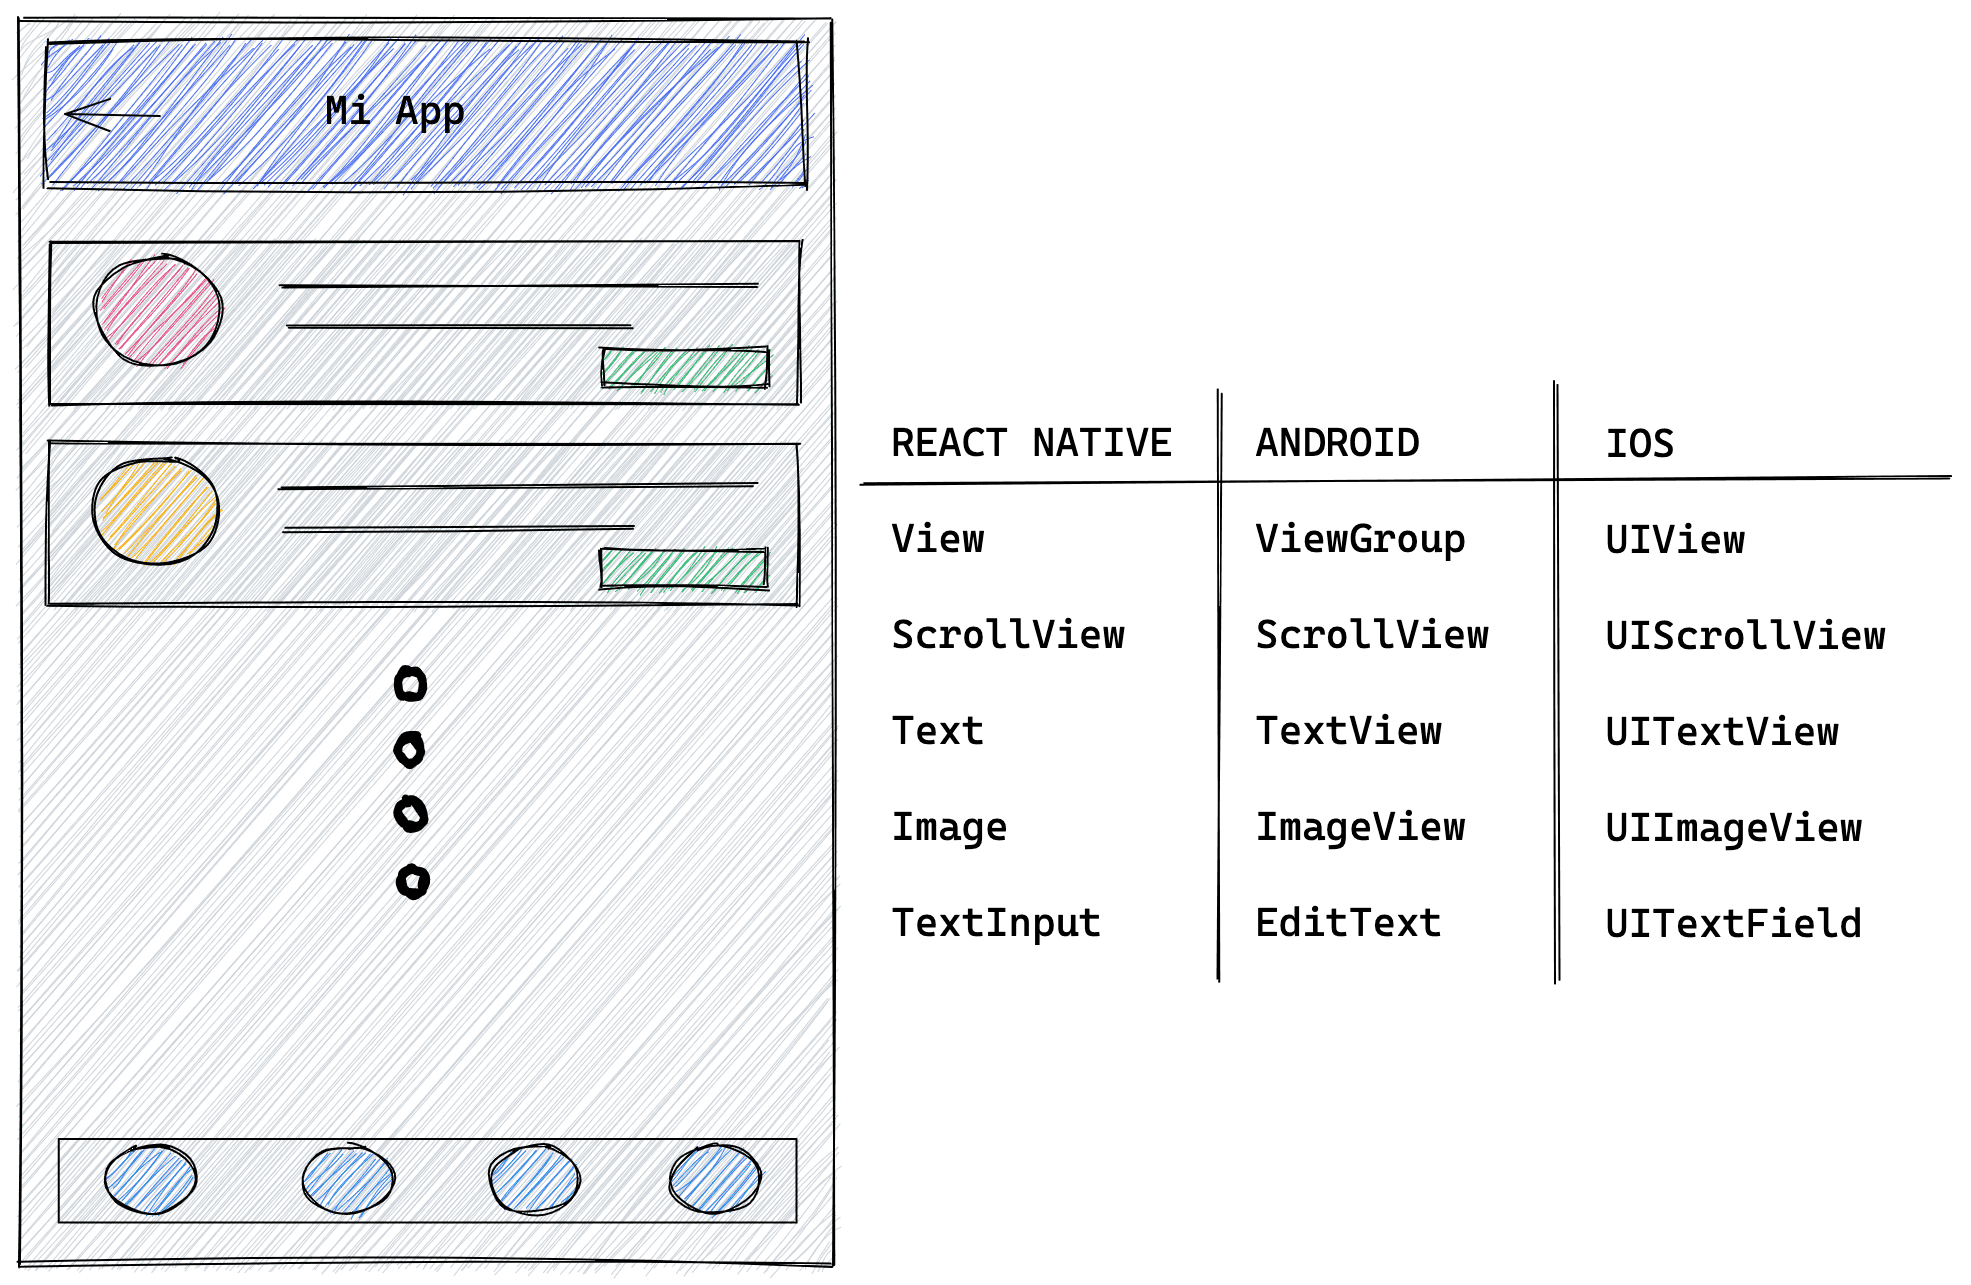
This is what allows React Native components to be converted into native components. For example, a View component in React Native is transformed into ViewGroup in Android and UIView in iOS.
How to create the first Android Native Module?
You can follow this explanation in this repository by navigating the different branches and see the progress.
To start you need to create a java file inside android/app/src/main/java/com/{APP_NAME}/MyNativeModule.java with this initial content:
// MyNativeModule.javapackage com.mdevconf;import android.util.Log;import androidx.annotation.NonNull;import com.facebook.react.bridge.ReactApplicationContext;import com.facebook.react.bridge.ReactContextBaseJavaModule;import com.facebook.react.bridge.ReactMethod;public class MyNativeModule extends ReactContextBaseJavaModule {MyNativeModule(ReactApplicationContext context) {super(context);}@NonNull@Overridepublic String getName() {return "MyNativeModule";}}
An important detail of the previous code is that the new Java class has to extend ReactContextBaseJavaModule, which is the base for building the Native Module. Also, note the getName method that gives the name to the Native Module so that it can be accessed from Javascript with that same name, for example, you can access this in a React Native component through:
const {MyNativeModule} = ReactNative.NativeModules;
2. Export a native method to Javascript (branch)
You need to create a method that can eventually be used from Javascript, in this case, it will be a simple Logger that allows us to show a message in Logcat.
This method is annotated with the @ReactMethod decorator to indicate that it will be used within the Javascript code.
// MyNativeModule.javapublic class MyNativeModule extends ReactContextBaseJavaModule {...@ReactMethodpublic void simpleLogger() {Log.d("MyNativeModule", "Log desde la el modulo nativo!");}}
3. Register the Native Module (branch)
The next step is to register this module in a package, to achieve this you need to create a new Java file inside android/app/src/main/java/com/{APP_NAME}/MyPackage.java with the following content:
// MyNativePackage.javapackage com.mdevconf;import androidx.annotation.NonNull;import com.facebook.react.ReactPackage;import com.facebook.react.bridge.NativeModule;import com.facebook.react.bridge.ReactApplicationContext;import com.facebook.react.uimanager.ViewManager;import java.util.ArrayList;import java.util.Collections;import java.util.List;public class MyNativePackage implements ReactPackage {@NonNull@Overridepublic List<ViewManager> createViewManagers(@NonNull ReactApplicationContext reactContext) {return Collections.emptyList();}@NonNull@Overridepublic List<NativeModule> createNativeModules(@NonNull ReactApplicationContext reactContext) {List<NativeModule> modules = new ArrayList<>();modules.add(new MyNativeModule(reactContext));return modules;}}
With this file, what you do is register the Native Module within a package so that it can be used in MainApplication.java
4. Register the package (branch)
To achieve this, you need to modify the MainApplication.java file as follows:
// MainApplication.javapublic class MainApplication extends Application implements ReactApplication {private final ReactNativeHost mReactNativeHost =new ReactNativeHost(this) {.......@Overrideprotected List<ReactPackage> getPackages() {@SuppressWarnings("UnnecessaryLocalVariable")List<ReactPackage> packages = new PackageList(this).getPackages();// Packages that cannot be autolinked yet can be added manually here, for example:// packages.add(new MyReactNativePackage());packages.add(new MyNativePackage());return packages;}.......};.....}
With these changes, the Native Module is ready to be used from Javascript. At this point, it is important to run the application from scratch with the command:
npx react-native run-android
5. Import and use in React Native! (branch)
At this point you can import the Native Module in your React Native components and use it as follows:
// App.jsimport {...NativeModules,...} from 'react-native';const {MyNativeModule} = NativeModules;const App = () => {const onPressButton = () => {console.log('Este es un log desde javascript');MyNativeModule.simpleLogger();};return (<SafeAreaView><StatusBar barStyle={'light-content'} /><View style={styles.container}><Text style={styles.text}>Hello MDevConf!</Text><Button title="Click me" onPress={onPressButton} /></View></SafeAreaView>);};
This is a very simple example, what you need to do is import the NativeModules from react-native, destructure our native module, and in this example we named it MyNativeModule, once we have access to the native module we can invoke the method we exported to register a log in the device LogCat when we click the button.
MyNativeModule.simpleLogger();
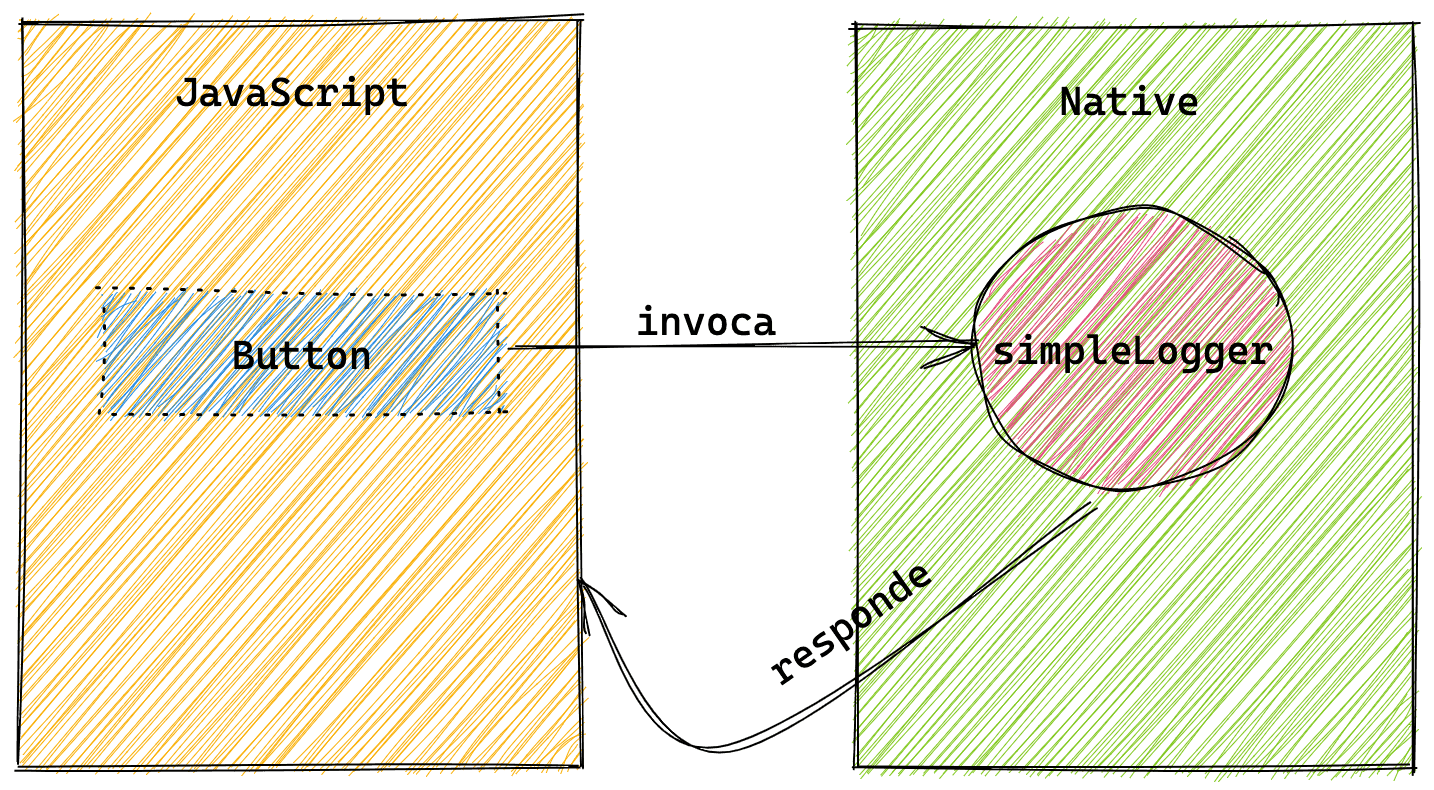
Once the app is running in an emulator and the user clicks the button, you should see the following log in LogCat:
